Instant Pot Beef Biryani

One pot week night meal, ready in 30 mins that is sure to impress your guests, family and yourself!


If you were trapped on an island with only one dish to eat for the rest of your life, what would it be? For me, that’s easily Biryani. The aromatic basmati rice, mixed with all the earthy spices and cooked to perfection simply cannot be beat. Every region seems to have their own “biryani”, take for example Paella with the Spanish or Jollof Rice from the Nigerians. So it’s fair to say, rice mixed with spices and meats makes for one heck of a delicious meal.

Ingredients:

1 ½ cups aged, long grain basmati rice

1/2 cup avocado oil

1 medium red onion thinly sliced

2 small (or 1 large) bay leaves

1/2 tsp whole black peppercorns

1 2-inch piece cinnamon stick

1 small black cardamom optional

5 whole cloves

1 tsp cumin seeds

½ tsp coriander seeds crushed

1.5 cups water

(Optional) 3/4 cup cut vegetables (I used frozen carrots and peas, but highly recommend chopped cauliflower, green beans and/or potatoes as well)

Marinade:
2 lb cubed stew beef (I used extra lean but you can use any, including lamb)
1 cup full fat yogurt
1 tbsp red chili powder (cayenne)
2 tsp turmeric
4 cloves garlic crushed
3/4 inch piece ginger crushed
1 cup of chopped cilantro and mint
2 tbsp garam masala
2 tbsp cumin powder
2 tbsp coriander powder
2 tbsp shan biryani powder (optional but highly recommended, it can be found in any Indian grocery store)
2 green chili peppers whole or split in half (optional) 2 ¼ tsp kosher salt divided (or to taste)

*Key – rinse out the rice a few times and soak in water till ready to cook. This removes the extra starch from the rice and helps get the fluffy texture*

Instructions:

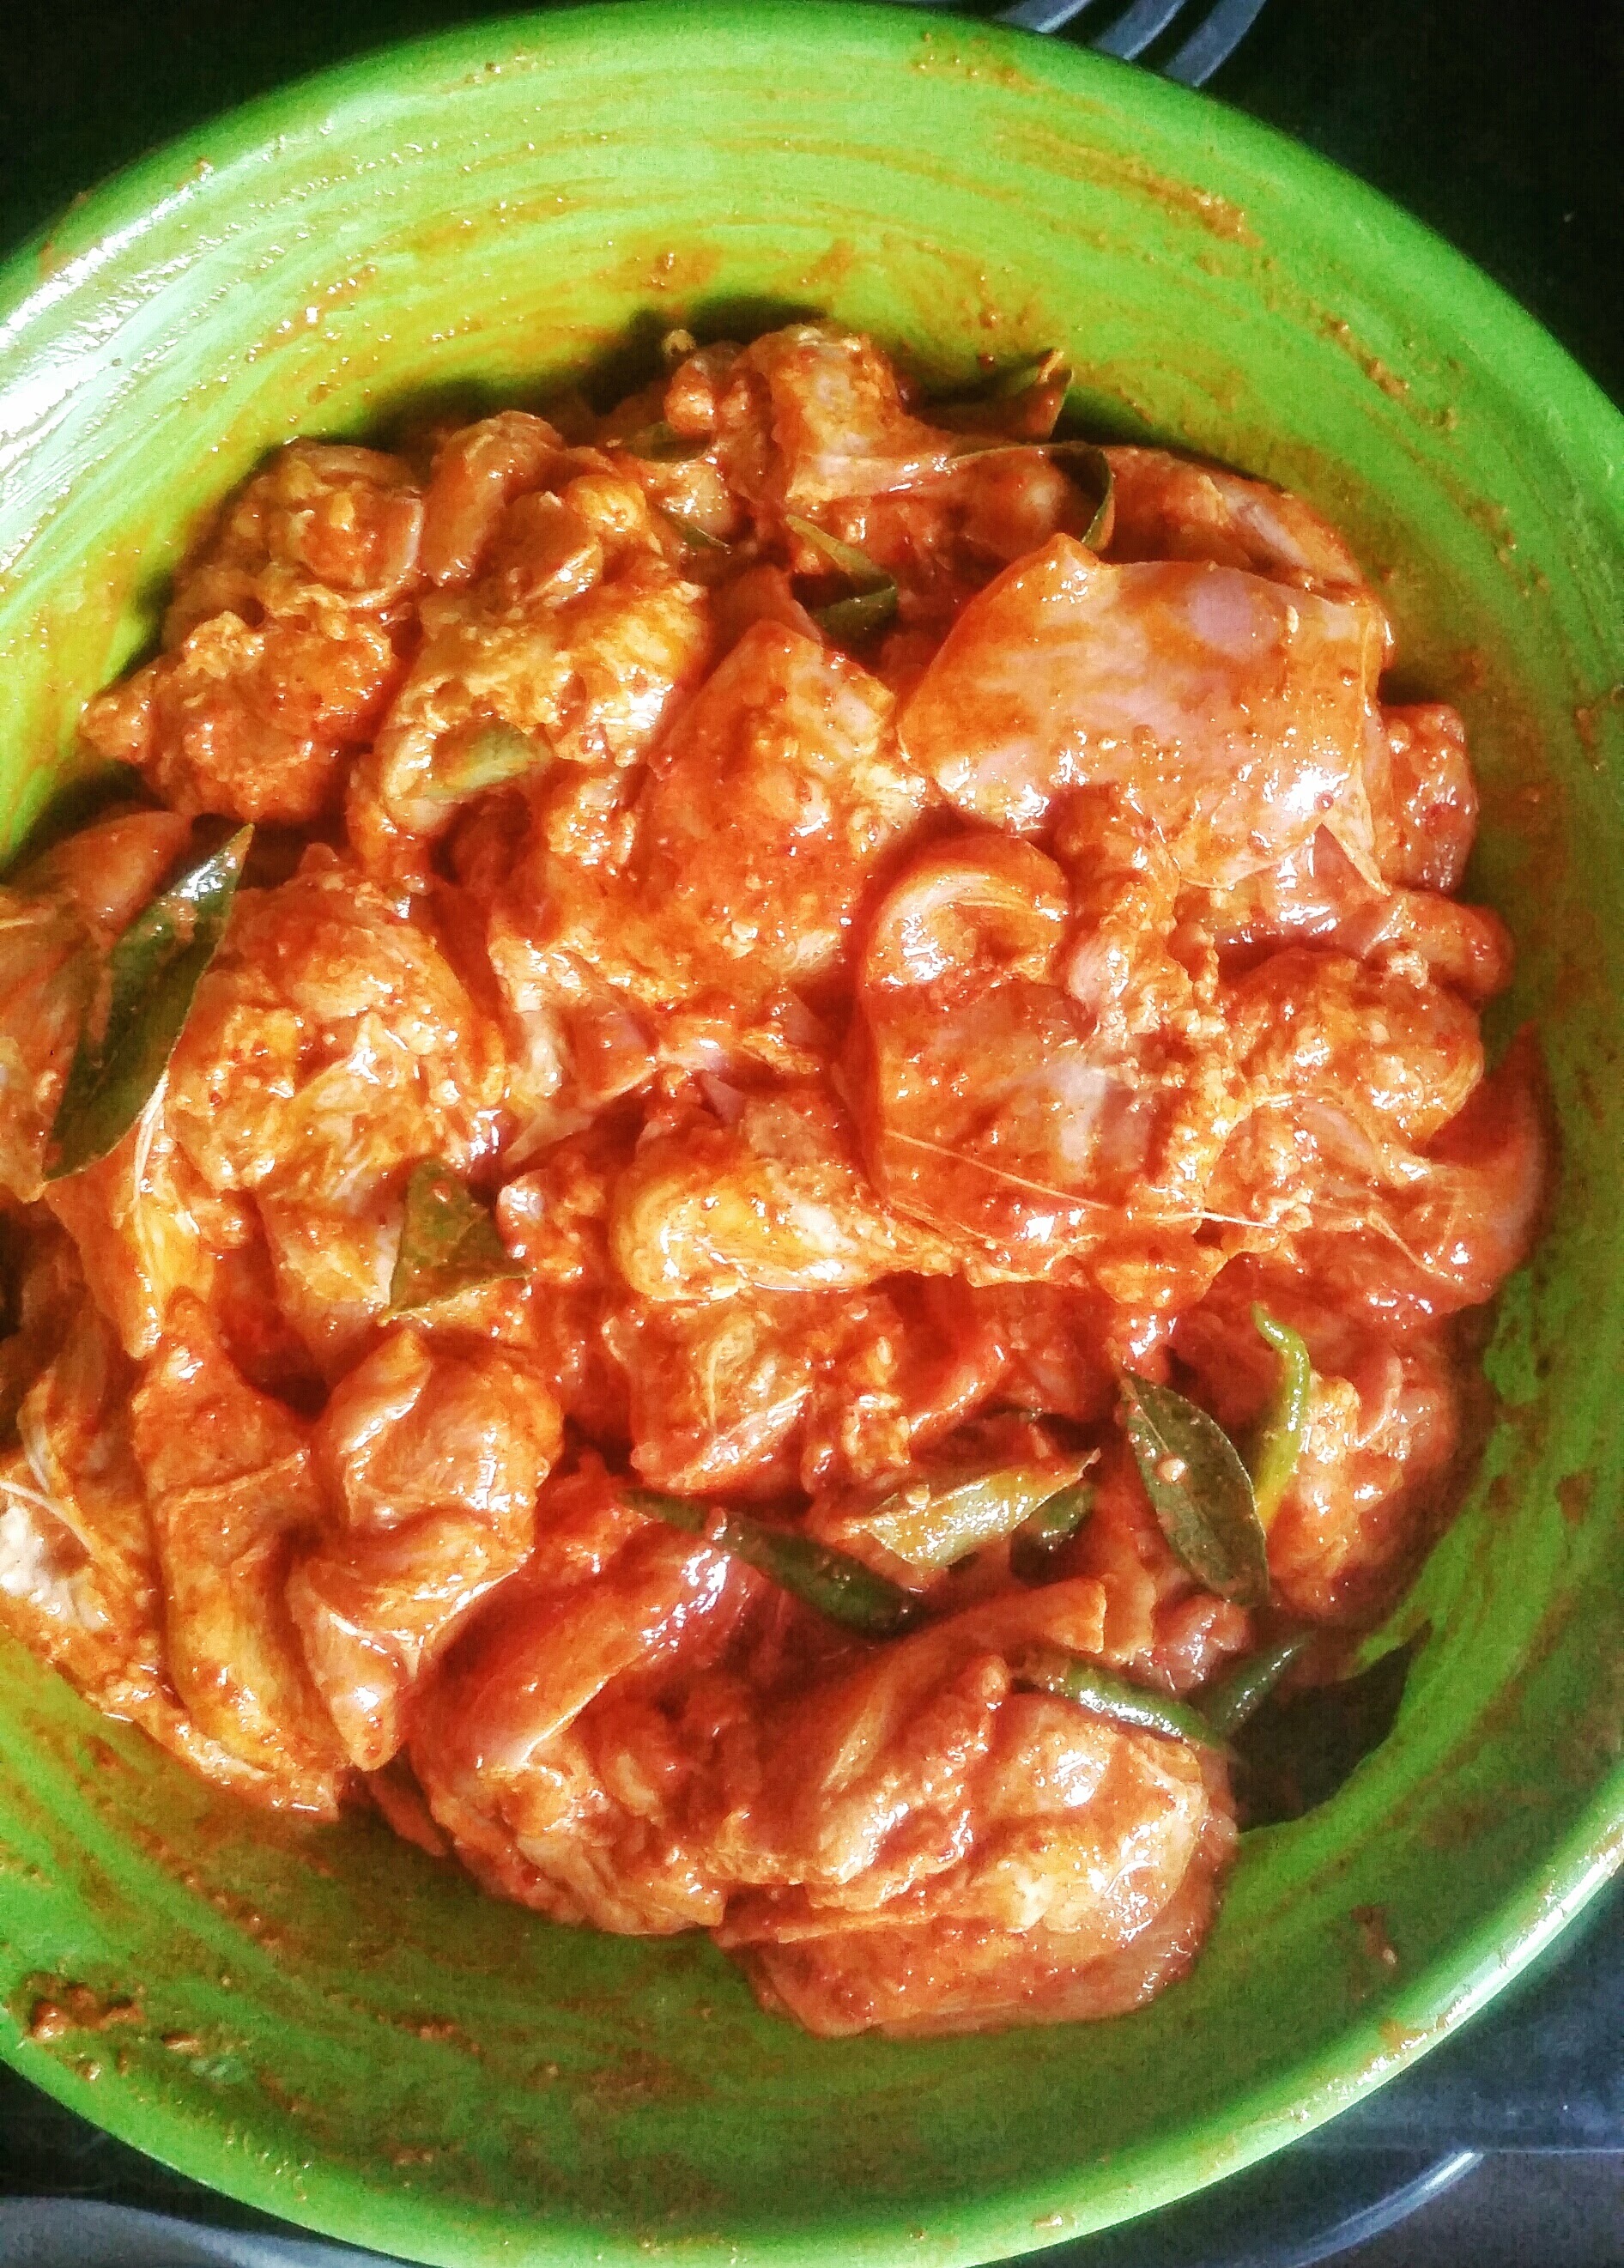
1) Add all ingredients under Marinade except half cilantro/mint and mix thoroughly, refrigerate for atleast 30 mins or more. The longer you refrigerate the more tender and flavorful your meat will turn out.


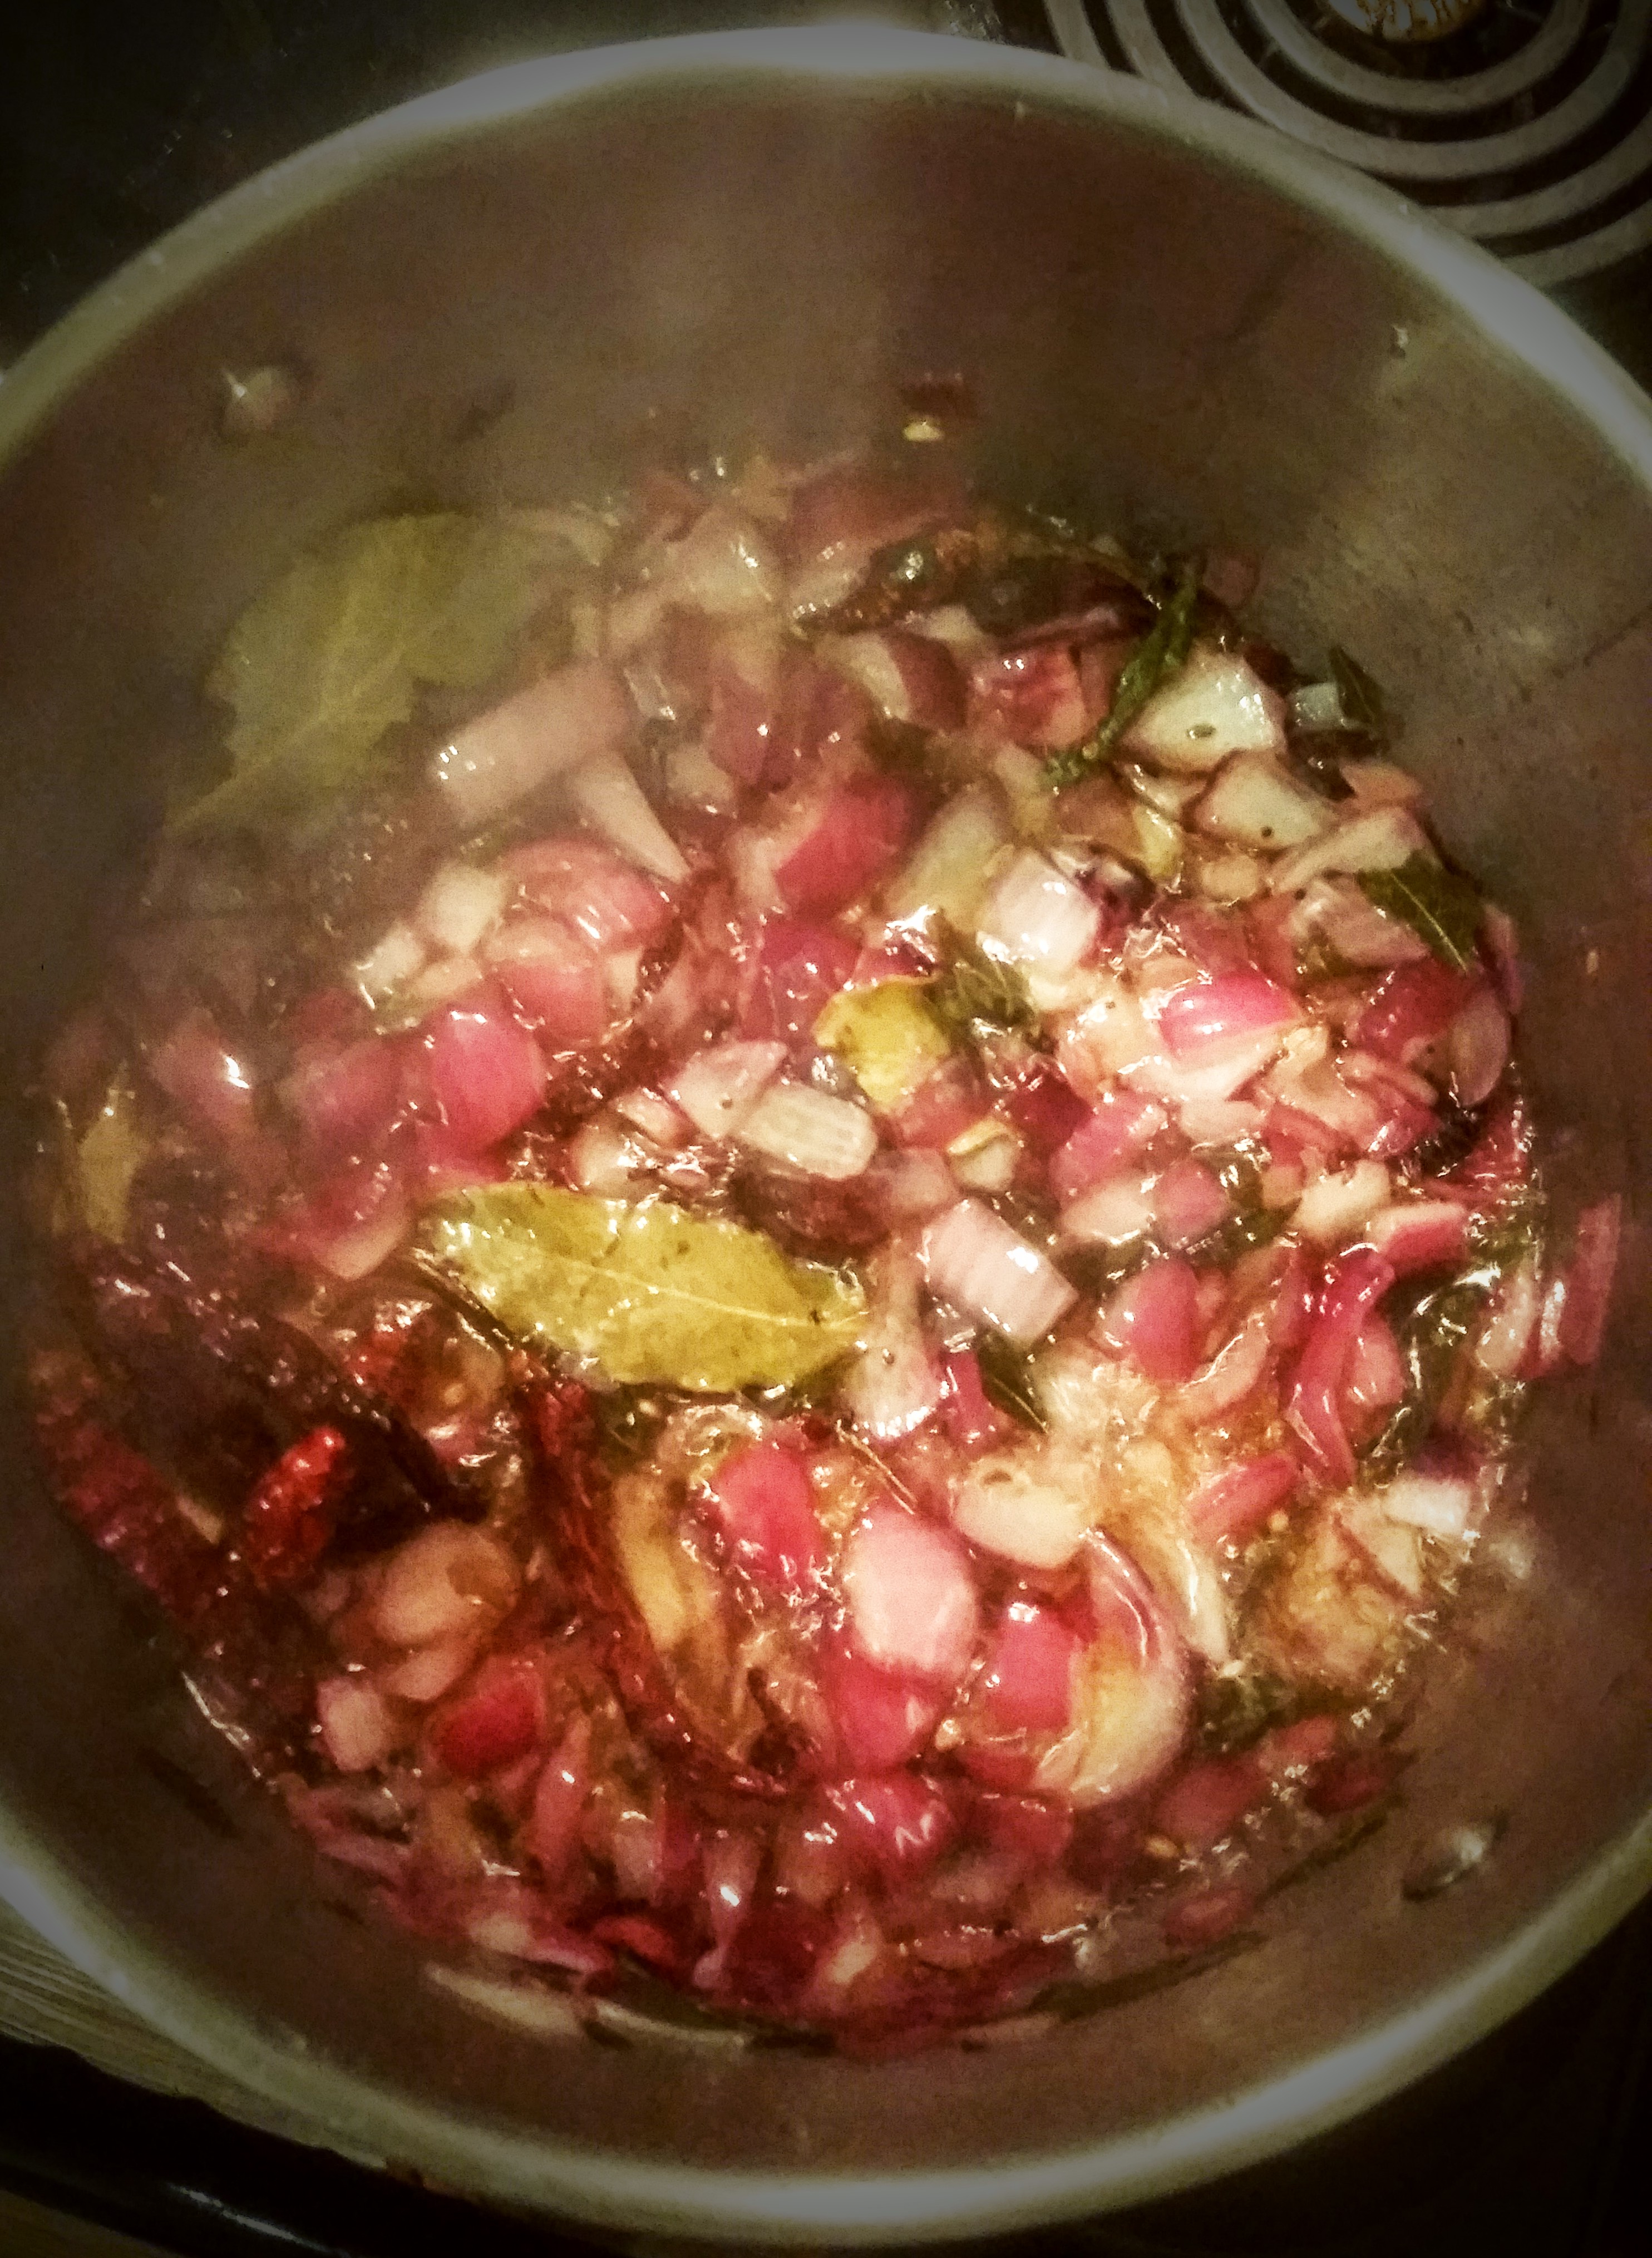
2) Turn your Instant Pot on to Saute function and add in oil and onions. You will fry these until they caramelize to a brown color. Watch closely, they do burn easily. This should take roughly 20 mins.

3) Remove half of your fried onions. While still on Saute add in the entirety of the marinated beef, the whole spices, along with 1 cup of water.


4) Set to Pressure cook on High for 12 mins


5) Manually release and add in soaked rice + remainder of the water + vegetables ( if using). Do not mix in the rice, flatten it out so it is immersed in the water.


6) Set to Pressure cook on High for 5 mins


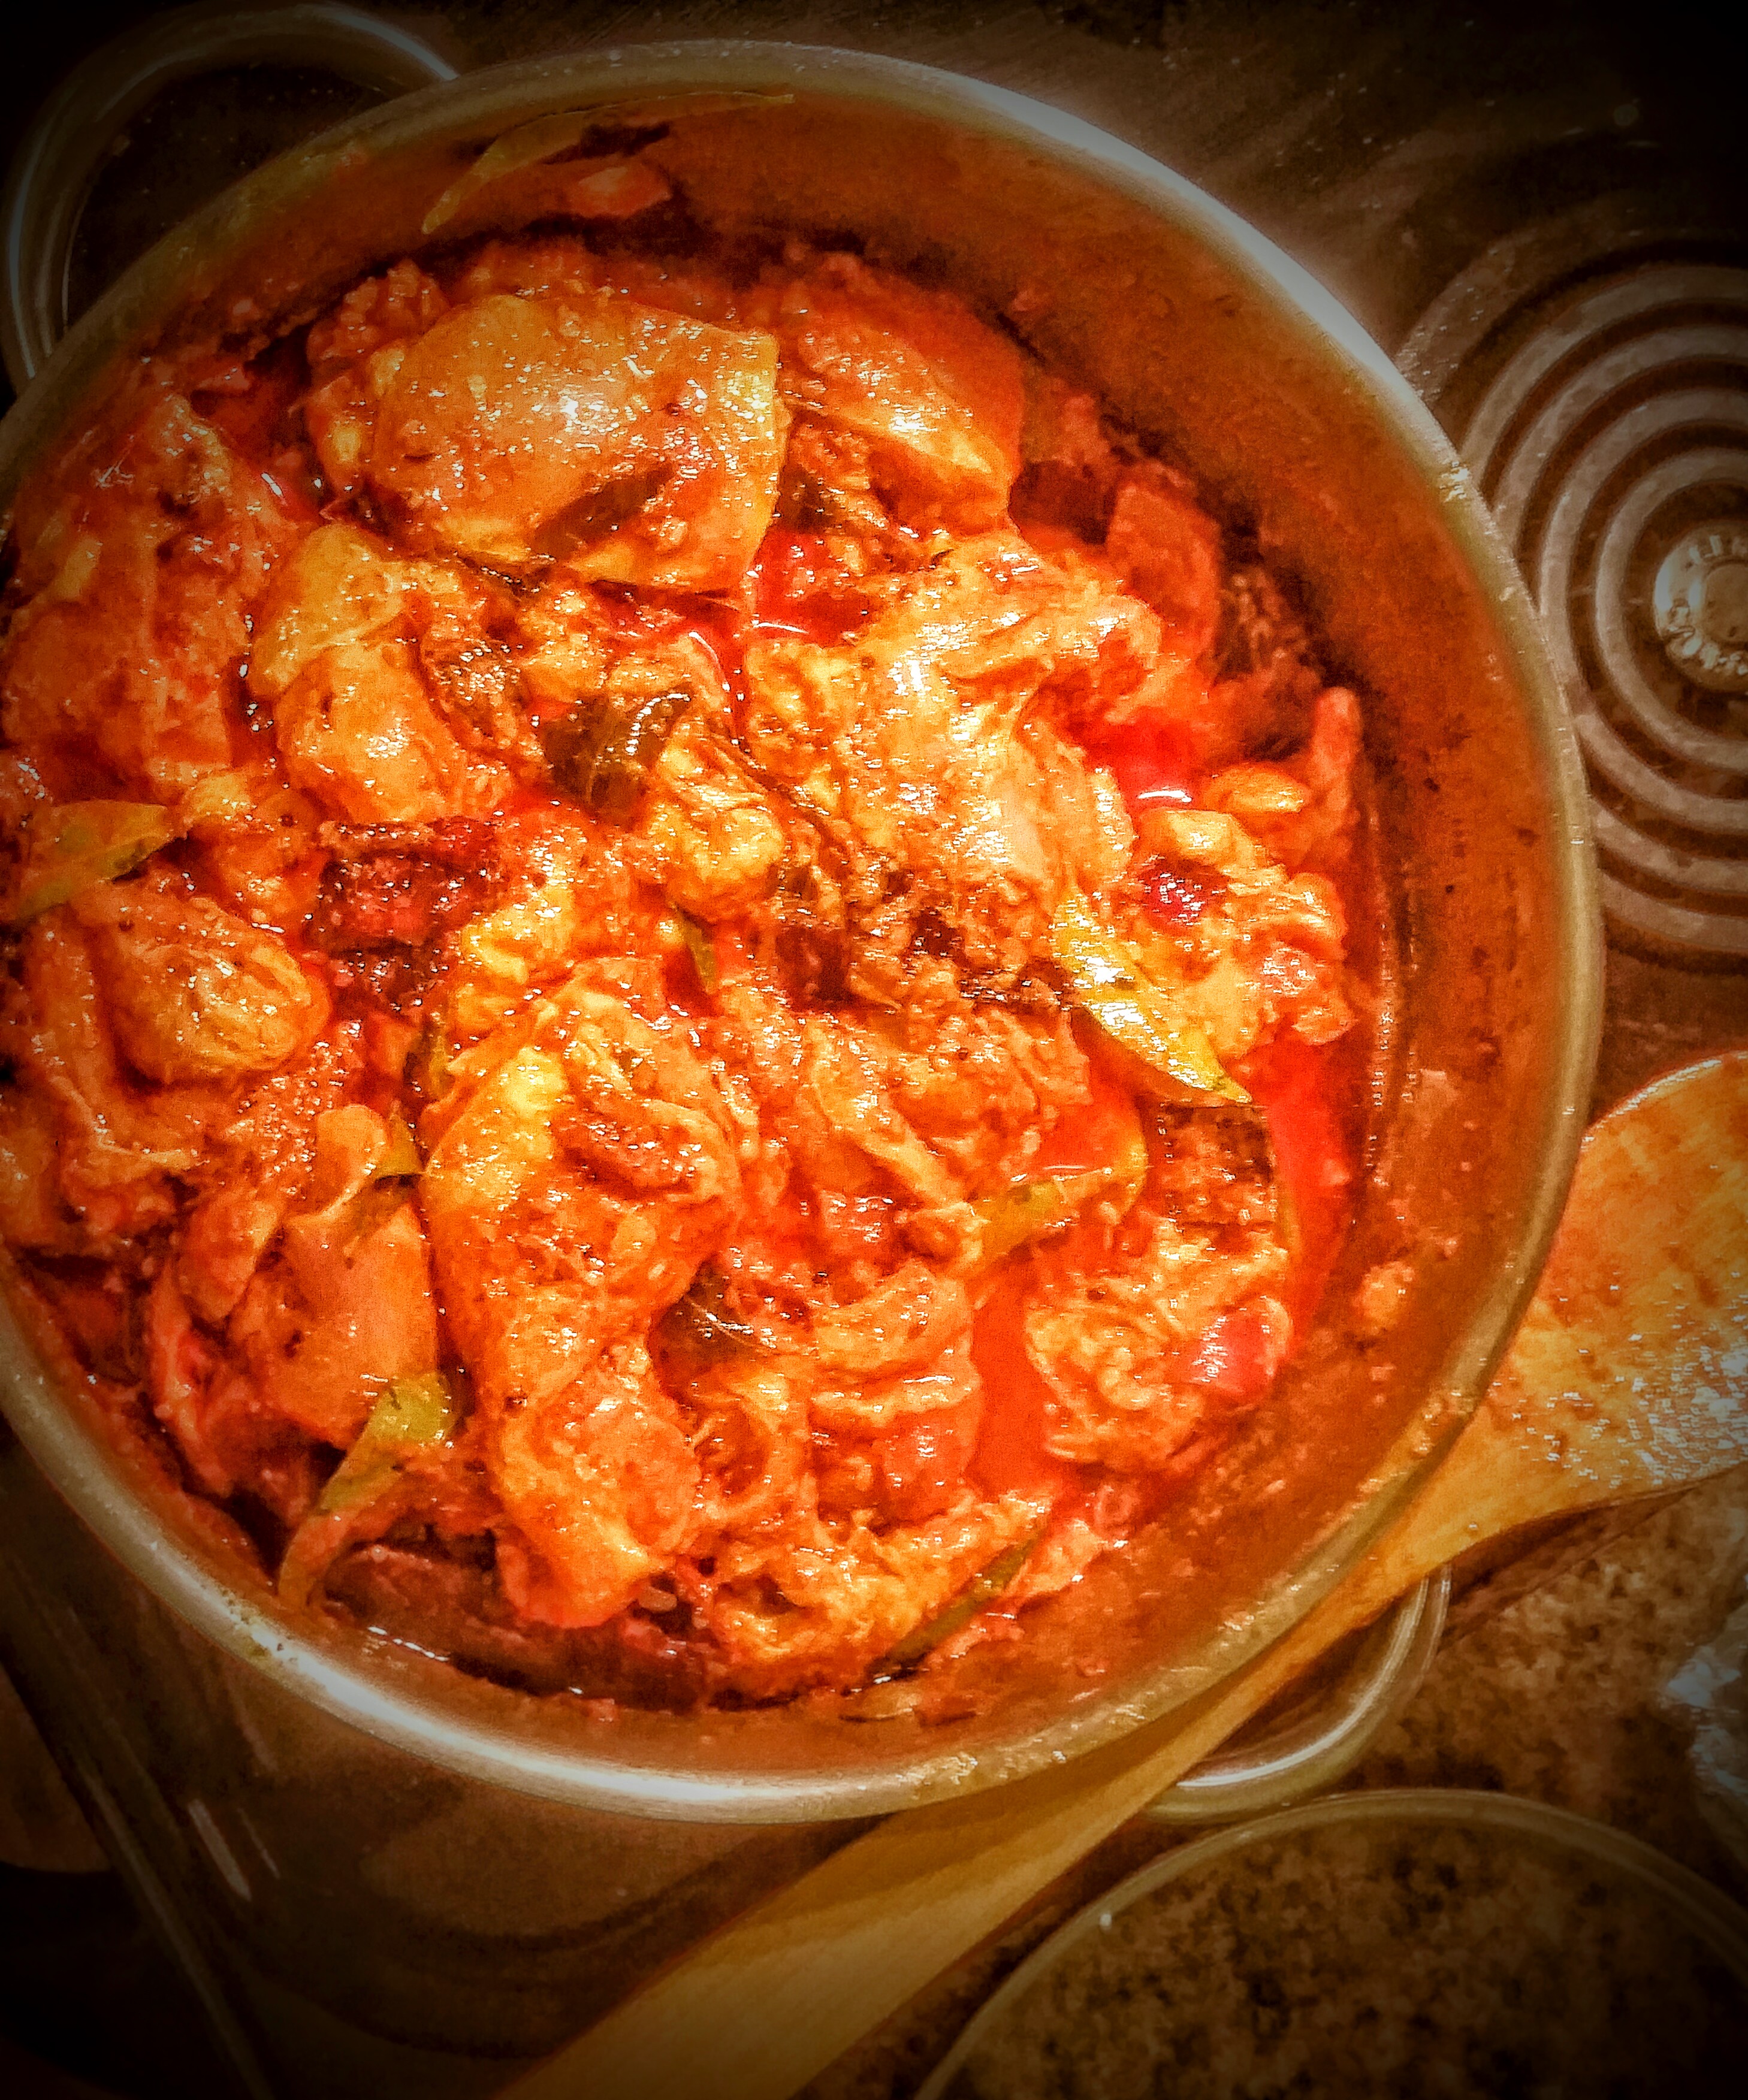
7) Let release on it’s on own for about 10 mins. Add in remainder of fried onions and remainder of chopped cilantro/mint. Combine and add extra salt if necessary. Serve over freshly squeezed lemon juice

Bon Appetit! How did this turn out for you? Leave comments below 🙂

Ankitha Gadag’s Spicy Chicken Stirfry

An Ankitha Gadag original recipe – learn how to make a super delish Asian inspired stirfry !

Hey guys, welcome to Ankitha Gadag Recipes!

This recipe gives me life, seriously. It’s the perfect weeknight entree or side and it’s great for getting rid of those veggies in the back of your fridge, going bad. You can throw anything you like in there, I chose to stick with the basics – bell peppers, broccoli and jalapeno peppers.

I am going to let you all in on a little secret. The secret to a great Asian-inspired stir fry lies in 4 basic ingredients – soy sauce (duh), rice wine vinegar, fish sauce, and sesame seed oil. These 4 ingredients paired together can make any stir-fry taste uhhhhmazing.  For more Thai style dishes, I always mix in some fresh Thai basil leaves. You can learn more about my obsession with them from one of my previous posts here.

Without further ado…


Ingredients:

  • 1 lb Chicken breasts (cut against the grain, into strips – this is important!!)
  • 2-3 jalapeno peppers (thinly sliced)
  • Veggies of your choice (broccoli,  bell peppers)
  • 1-2 cloves garlic
  • 1/2 inch ginger scraped
  • fish sauce ( few splashes )
  • rice wine vinegar ( few splashes)
  • sesame seed oil (few splashes)
  • soy sauce (1 cup)
  • lightly dusted Arrowroot Starch
  • S & P
  • toasted sesame seeds (optional)
  • thai basil leaves (optional)
  • 1 cup chicken broth


  1. Pat chicken breasts dry, cut against grain into strips. Add S&P and dust with arrowroot starch
  2. In a small bowl, whisk together the broth, fish sauce, soy sauce, vinegar, and sesame seed oil
  3. Warm a wok or large frying pan over medium-high heat and add the oil. Add the chicken and stir–fry for 5 minutes until lightly browned.
  4. Add the veggies and cook an additional 5 mins. 
  5. Whisk the sauce once more and pour it into the pan. Bring liquid to a boil and let simmer until it reduces by half, about 3 more minutes.
  6. Stir in the basil and cook until it is just wilted.
  7. Serve immediately.

For step by step deets, check the video below:

As always, thanks for watching. See y’all next time.

XOXO,

Ankitha Gadag

Smoked salmon stuffed Curd rice – Ankitha Gadag Recipes

A fusion of South Indian and Mediterranean Cuisine!

At Ankitha Gadag Recipes, we love putting spins on traditional flavors. What happens when you take two exotic cuisines and combine them in a plate? Flavor BOMB people, that’s what. Here we have a traditional smoked salmon dish with capers that one would consider very Mediterranean combined with South Indian yogurt rice or fondly known as “curd rice.” Check out the recipe below at one of my favorite blogger’s site!


Curd rice/ Thayir sadam is more often eaten by the south Indians as a part of meal. Rice and yogurt are the 2 main ingredients that go towards making this. It is called as thayir sadam in kerala. Yogurt rice can be made in different ways. I am sharing this with bit of fusion of…Read…

via Smoked salmon stuffed Curd rice / Thayir saadam. — keralaslive

Ankitha Gadag’s Baked Whole Snapper Recipe!

A great week night recipe when you are running low on energy and time. Another Ankitha Gadag original recipe!!

Fellow Bloggers & Readers,

First off, I, Ankitha Gadag owe you all an apology. I cannot believe it’s been over 14 days since I have posted a recipe to Ankitha Gadag recipes! This is not the Ankitha Gadag treatment I would like to uphold for my readers.

That said, boy do I have a treat waiting for you guys. Before we get into that, let me update you guys on what has been keeping me busy these last few weeks.

ART

Yes, my passion. I decided a few weeks ago that I was going to take the plunge and give my artwork the fair shot of being visible to the masses. That was really my only goal. I had no idea HOW or WHAT I was going to do to make this happen, but I took it step by step.  Started by researching a few shows nearby, and submitted my work to one that looked easy enough to apply to… and VOILA! Ankitha Gadag is a featured artist at the upcoming Pancakes & Booze art show.  That was the single catalyst that has gotten the ball rolling on all the work I have been procrastinating for… since forever.  (Just to give y’all a sneak preview, here’s one of the pieces I’ll be showcasing 🙂 )

tree.jpg

If you want to see the rest of the work, check out my Etsy page here: https://www.etsy.com/shop/AnkithaGadagCreation

Any who, back to why were all here: FOOD!! Today’s recipe was a little challenging for me, but if y’all know me you know me, you know I love a challenge! I love fresh fish, and I wanted to try cooking a whole fish, but I requested that the butcher take out the eyes. He looked at me perplexed, but did it anyways. I didn’t want to have the added anxiety of eyes staring up at me while I was garnishing the fish’s interior.

I used a beautiful red snapper, I highly recommend you request the butcher to de-scale and de-bone the fish!

ankitha-gadag.jpeg
Notice: No eyes

Here is what you will need:

  • Fish of your choice ( I used a red snapper)
  • compound butter (I used a garlic herb butter)
  • 2 clove garlic
  • lemon pepper seasoning
  • lemon
  • salt/pepper to taste
  • basil

ankitha-gadag-snapper.jpeg

Method:

  1.  Melt the butter and add the seasoning and garlic into the butter.
  2.  Cover the cleaned finish with the butter seasoning mix. Make sure to dress the cavities of the fish thoroughly
  3. Top with the lemon slices and basil

ankitha-gadag-snapper-fish.jpeg

Cover and bake for 15-20 mins & enjoy!


ankitha-gadag-cooking.jpeg

How easy is that?? Literally 20 mins and great for a late weeknight meal. Pairs wonderfully with a simple cucumber avocado salad or fresh greens!


Let me know how you guys like it!

Thanks for reading!!

Ankitha Gadag

Oil-Free Arugula salad with Mandarin oranges

A healthy easy week night dinner salad with oil-free dressing!

Welcome to Ankitha Gadag recipes. I am your “host” Ankitha Gadag. Ankitha is the recipe curator behind all of the original recipes found here on Ankitha Gadag’s Recipes. 

ankitha-gadag-salmon

This light and refreshing salad is fantastic when paired with a nice fresh piece of salmon. Most people feel the need to pair a vinegar with an oil. What’s great about this salad is that it’s able to achieve great flavor & texture through champagne vinegar with no added oil! Have you guys tried champagne vinegar yet? I am new to this phenomenon but a definite fan 🙂

To get started, you will need:

  • 1 mandarin orange

ankitha-gadag-orang

  • 1/4th cup crushed walnutsankitha-gadag-walnuts
  • 1 cup arugula salad
  • 1/4 th cup shaved Parmesan cheese
  • drizzle of champagne vinegar
  • handful of raisins
  • S & P to taste

Directions:

  1. Combine all ingredients in a large bowl and serve!  Easy Peezy!

ankitha-gadag-salad


Hope you guys enjoy this delicious salad. Let me know how it tastes!

-Ankitha

Hyderabadi Achari Murgh Recipe – (Pickled Chicken Curry)

Spicy Hyderabadi Chicken Curry with tangy pickling spices

Okay guys, so this curry is truly a GEM and an Ankitha Gadag original recipe. I promise you, reactions will be nothing short of jaws-dropping if you decide to put in the work to give this a try!

For one, this recipe has taken a few weeks to perfect. I was first inspired to re-create this curry after tasting the most amazing Achari Chicken Curry at a local Hyderabadi restaurant. It was unlike anything I ever tried before – it was tangy, it was spicy, truly tantalizing your taste buds in every way. Of course I had to dig further and put my skills to the test.

Turns out Achari (Pickle) Murgh (Chicken) Curry actually originated in the Northern region of India (Punjab). Pickling of mangoes, limes and other vegetables would require a variety of spices all batched together for pickling. So, what do you do with the leftover spices? Make curry,  of course!

This curry has now been modified to fit South Indian taste buds (a.k.a – made spicier). Don’t fear, the heat is so well balanced with the unique flavors from the kalonji (onion seeds), fenugreek, and yogurt 🙂

ankitha-gadag-marinade-achari

On to the recipe!

You will need:

  • 1 cup curry leaves
  • 4 lbs chicken thighs
  • 10 thai chillies
  • 3-4 dried red chillies
  • 2 bay leaves
  • 3 onions chopped
  • Ginger-garlic paste (4 tbsp)
  • Kalonji (onion seeds)- 1 tbsp
  • Methi (fenugreek) seeds- 1 tbsp
  • Jeera (cumin seeds)- 1 tbsp
  • Saunf (fennel) seeds- 1/2 tbsp
  • Tomatoes- 2 (finely chopped)
  • Yogurt- 1/2 cup
  • Lemon juice- 2tbsp
  • Turmeric powder- 1tsp
  • Red chilli powder- 1 tbsp
  • Mustard seed oil – 1/4th cup
  • Pickling spices  – (you can get a pre-packaged packet of this) – 4 tbsp
  • Mango Pickles – (1 tbsp)

Phew, that’s a handful, yea?

Method:

  1. Start by marinating the chicken, you can marinate as long as 12 hrs or as short as 2. Add lemon juice, chillies, half of curry leaves, red chilli powder, turmeric powder, half of pickling spices, salt, yogurt, and mustard seed oil  to the chicken. Mix and set aside.achari-chicken-curry
  2. In some oil (about half cup), add the onions and fry until they are translucent. Add in curry leaves, dried red chilies, bay leaves, cumin seeds, fenugreek seeds, kalonji, and ginger garlic paste.ankitha-gadag-achari-chicken.jpg
  3. Add in the tomatoes and any remaining spices. Mix into the spices until soft.
  4. Add in the marinated chicken and cover on low-medium heat for about 30 mins
  5. The water from the chicken and yogurt should have formed a gravy. At this point add in the mango pickle.
  6. Stir and cover for an additional 30 mins
  7. Warm up some hot naan or some basmati rice and Serve!!ankitha-gadag-achari-chicken-curry-meal

Thanks for checking out my recipe. Let me know how you liked it!

-Ankitha Gadag

Balsamic Ginger-Marmalade Glaze for Salmon

How to make a quick and easy sauce for seared salmon

Ever wondered what to do when cooking your favorite fish, other than add good old salt and pepper? This glaze is your answer.

It’s easy and fast to make with ingredients you have at home. I used this recipe for salmon, but it is versatile and will go great with any  fish. I used ginger jam for this recipe since ginger offers great health benefits. Ginger has well known  anti-inflammatory and  anti-oxidant properties that make it ideal for incorporating in everyday recipes. The combination of the gingery spice with the sweetness from the jam, make your taste buds want to dance with joy. However, you can substitute any fruit jam/preserves/marmalade when making this recipe yours (look for all natural ingredients, minus the high fructose corn syrup when choosing your jam)!

Let’s get started!

ginger-salmon-sauce

Ingredients

(for the sauce)

  • 3 Tbsp of ginger jam
  • 1.5 Tbsp of balsamic vinegar
  • 1 tbsp dried basil
  • 1 tbsp dried chives
  • 1/2 cup butter
  • salt and pepper to taste

(for the fish)

  • skin-on wild salmon ( 6-7 inches)
  • salt and pepper
  • oil for searing

Preparation:

  1. Start by adding salt and pepper on your fishwild-salmon
  1. Next, sear your fish on a heavy skillet with a drizzle of oil. You will be using the remnants to make the sauce .

  2. Take out your fish after a quick, high heat sear (about 2 mins each side), and bake the remainder in the oven for a 5-7 mins. Total cook time of sear and bake should be less than 10 mins.

  3. Use the searing pan for the sauce. Scrape up all the remnants.

  4. On low heat, add all the ingredients for the sauce

  5. Whisk until desired consistency is achievedIMG_4944-01

Thanks for reading and following!

-Ankitha Gadag

Chilled avocado & cucumber soup

Light, refreshing and creamy with cool flavors from mint and dill

You don’t normally think of soups in the summertime, especially not in Texas. However, this COLD cucumber and avocado soup hits the spot with its refreshing ingredients. It’s creamy, with a slight heat from the garlic & serrano. It gets layers of flavor from the fresh  dill and mint. Contrary to traditional hot soups, this chilled soup is absolutely delightful on a hot summer afternoon on the patio (margaritas recommended).

I was inspired to create this soup when a friend put me up to a food challenge. Her criterion was “cucumbers” and “chilled.” This was out of my comfort zone. Normally, my recipes pack heat from various spices and they normally involve a protein of some form. This was such a fun challenge, because it was so easy to make with relatively few ingredients that I would never think of combining. More than likely, most of these ingredients are already in your fridge.

Anyways, give it a shot (before the summer ends!), and let me know how it turns out 🙂

chilled-cucumber-soup

You will need:

  • 1 avocado
  • 1 serrano
  • 2 cloves garlic
  • 2 english cucumber (peeled)
  • fresh mint (1 bunch)
  • fresh dill (1 bunch)
  • 1 1/3 cups sour cream
  • 1 1/3 cups greek yogurt
  • 1 cup vegetable broth


cucumber-avocado-soup

Method:

  1. Combine all ingredients above in your blender.
  2. Puree to a fine, creamy texture
  3. Add salt, black pepper to taste. I topped off with some smoked paprika for a little kick 🙂

creamy-avocado-cucumber-soup

That’s it! Easy peeezzyyyy 🙂

Let me know how it turns out, would love to hear from you!

-Ankitha


Shrimp and Veggie Pesto Pasta

Pasta can be flavorful… and healthy
This spicy, garlic pesto shrimp pasta is packed with mouth-watering flavors. Its still creamy from the pesto yet light without all the heavy cream that is typical of pasta dishes. The charred broccoli in the dish brings a great crunch to complement the shrimp. This dish is truly the best of both worlds… flavor and health.
I used an orecchiette pasta from Italy for this dish, but feel free to incorporate your favorite type of pasta. I have tried this recipe in the past with angel hair pasta and spaghetti.

spicy garlic shrimp pesto pasta

Ingredients: 

  • Garlic (A TON, around 10 cloves)
  • Parsley (a handful)
  • Shrimp (1 lb)
  • 1/4 th cup pesto ( used this pre-made italian version which can be found here )
  • dash of black pepper
  • 1 jalapeno
  • dash of dried basil
  • dash of dried oregano
  • dash of red pepper flakes
  • Broccolli florets ( I used broccolli, but this would also go great with mushrooms, asparagus, or zucchini)
  • 1 lime
  • Parmesan grated (for topping)
  • Pasta ( of your choice, I used orecchiette )
Recipe:
garlic parsely pesto

  1. Grind the garlic, parsley and jalapeno into a paste
        2. Heat olive oil in low heat, and add the parsley pesto blend (from step #1) into the pan
  1. Add in the shrimp to this mix

  2. Cook on low heat for a few mins. Add the lime, salt, and black pepper at this point. You want  to heavily coat the shrimp with the black pepper.

  3. After cooking for 5-7 mins, add the broccoli florets, pesto, and all other spices. Stir in and cover for 5-10  mins.

pesto shrimp
  1. Once the flavors are cooked into the shrimp and the veggies, it will form a gravy. At this point you can add in the pasta.and stir. You can avoid overcooking the shrimp by turning off the heat before the shrimp start to form into circular rings.

  2. Top with a heaping spoonful of Parmesan, and serve! Voila!

%d bloggers like this: